Showing posts with label home office. Show all posts

Sunday, January 1, 2017

DIY Vinyl LP Record Album Floating Wall Shelves

Here's a simple and inexpensive shelving idea for displaying your LP 12" records! These come out and go in easily, and the shelf only needs to be cut down to the size you need. It's made out of vinyl so it is already white (or whichever color you choose) and will be super easy to keep clean.

Here's the finished product:


The two floating record shelves you see in this picture are approximately 88" long. The vinyl comes in 8' sections.

What you'll need for one 8' shelf:
Cut U cap with a jigsaw or something similar, if needed.

U cap lattice moulding.

This groove accommodates records perfectly.

 Looking at the back of your U cap, stack 2 washers together and then add a brace, and screw all 3 into the cap with a #8 x 0.5 flat head screw, making sure the screw does not protrude into the U cap channel. Repeat this process at equal distances along the length of the U cap. This goes U cap - 2 washers - flat head screw.

Hardware.

Back of the U cap shelf, 2 washers, 1 brace, 1 screw.

Grab a level and mount your shelves on the wall. Use the top hole on the brace and attach to the wall using drywall screws (or whatever you have). It's best to begin in the center of your shelf and work your way towards the ends, maintaining level as you go.

Records will slide in from either side (again, make sure none of those little flat head screws poked through) or you can place them into the groove.

Total cost for two 8' vinyl "vinyl" shelves was only $22!

Tuesday, January 28, 2014

Our DIY White Office Shelves

Since we moved our workspaces around, we now had a nice section of the office to install some shelving in. We used a few brackets from the Home Depot and some melamine shelving.

 Here's the bare wall before:

And after:
Still loving that Benjamin Moore Davenport Tan on the walls!

The only thing I would have done differently was snapped up these brackets from Ikea:

Maybe next time, right?

Monday, January 20, 2014

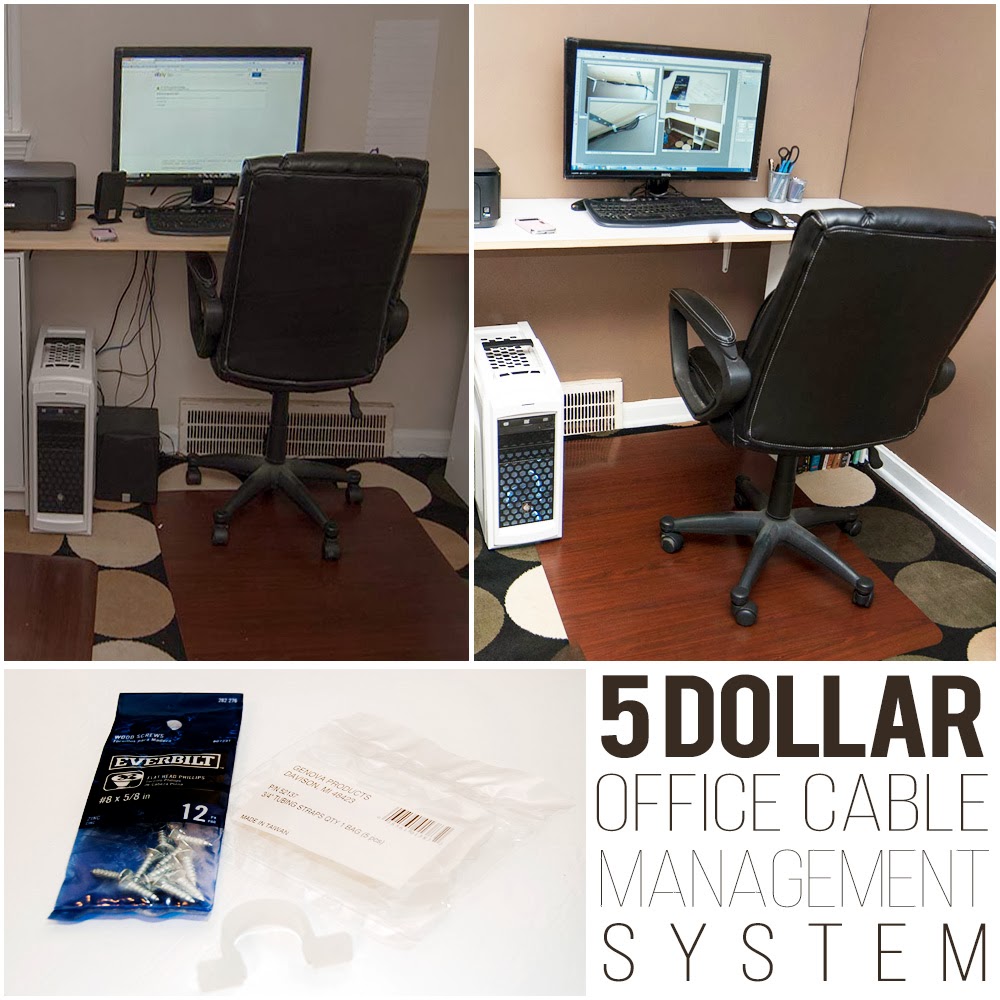
$5 Whole Office Cord Management and Organization!

In the process of re-doing our home office, I decided it was high time we get the cords off the floor.

We have to wrangle 2 full sized computers with monitors, keyboards, a 5.1 surround sound speaker system, laptops that come and go, a router, a network drive, a mobile airave and probably a few other random things I'm forgetting. Long story short, it's a mess and we have a terrible infestation of wire gnomes, to boot.

There's lots of options out there for cable management but it can get pricey and I don't really want to just wrap up my cables into bundles. Zip ties are great but not so much when you need to cut 15 or 20 of them off just to remove or add something. So I used my brains and hit the hardware store and came up with this very cheap, very easy, very tidy way of hiding all your office cables.


This is before. You'll notice the cords just hanging out all over the place. It's awful in that corner that you can't see in this picture.

Now here's the opposite side of the room, same PC and monitor, but no cords!

Get out your drills, ladies (and the boys, too). I got what I needed from Home Depot. Here's all you're going to need:
I bought 3 packs of tube straps and 2 packs of screws, totaling 15 straps and 24 screws. Under $5 to take care of the whole office.


 I put a strap and a single screw about every 12 inches. YMMV!

Click for closeup
Click for closeup

The screws are self-tapping and drill right in. Leave one out so you can pull down on the semi-flexible strap and shove cords in there. This is so easy and so cheap! $4.46 cents to do my whole office and I've got a whole package of plastic straps I haven't even used yet.

Sunday, January 19, 2014

Our Home Office: The "During" Phase.

Guy and I have been good little worker bees this weekend. We spent most of Friday and Saturday working in the home office. It's really the second bedroom of our little cape cod. We moved in, refinished the floors, threw a rug down, and cobbled together a desk that ran flush against 2 walls in the room. The layout of the desk is fantastic. It gives us a ton of useable space (really, enough for 3 full sized desktop computers, plus random network gadgets, and a printer) but we constructed it out of inexpensive pine. It's been sitting here, albeit serving the purpose it was put together for, looking naked and quite unfinished for a year now.


We liked Benjamin Moore's Davenport Tan pretty early on, and we ended up going with it. With our paint color finally chosen, we put up a new Hunter fan to replace the 10-year-old brass one that was up when we moved in.

The existing color in the office could be described as very light yellow-brown. And it was FILTHY. Even after a hard scrubbing it still looked dingy. Painting was a no-brainer but the desk surface took a little more thinking. The wood is cheap and uneven in spots, plus it's two pieces mended together. I wanted a white surface and one that will hold up to a LOT of use. Paint wasn't really on my list.

Here's some "before" shots of the office. I don't have a lot because it was so ugly it brought shame upon my entire family.

So retro, so grimey

What kind of Aunt makes their niece clean their house? *ME ME I DO*


The picture from the real estate listing. Notice the carpet.
Eek! I barely remember the wall-to-wall carpet in this place! And the photo from the real estate listing makes it look not-quite-filthy. For reference, that corner is the same one my niecey is standing in holding her broom. Yeah.

Now, we aren't quite finished with the office, but I have some nice in-progress shots, the walls are painted and the desk surface down, and I'm very excited because now all we have to do is some detail work!

Benjamin Moore Davenport Tan in a small office

Coat number 1

Desk grommets! I love these!

How did I do my pretty white desk? Come back and I'll tell ya!
Like I said, just details now, and I hope to have the grand unveiling before the month is out. One or two more trips to the Home Depot ought to do the trick.

I have a few tricks I'm employing to keep things neat, and I plan to share how I did it here pretty soon. 

I almost forgot, Marley was wonderful, she really held it together during us emptying everything out of the office, the vacuum and drill running, etc.

Just kidding!

whatareyoudoing
NO

Thursday, January 16, 2014

New Office Fan

Our office fan was probably the most recent addition to the house - it was from 2004. However, it was still shiny brass, because I guess they wanted to match the rest of the shiny brass in the house.

Well I'm the great brass remover!! And under my reign all shiny brass shall suffer!!

BRASS. Oh and this fan was wayyy too large for the room.
Out with the old...
Naked ceiling bits.
...in with the new!
Because no brass.

Here's the best part, I, frugal Jen found this fan on eBay for $50 shipped! Did I mention it's a Hunter and it doesn't.make.a.peep?

Don't worry about the "old" fan, it's being re-purposed elsewhere. Because there was a drill going and activity going on in the way of Guy and me getting up and down off chairs, Marley became sick to her stomach and felt lying down for a while might calm her nerves.

"... oh God..."
 Aaaand, we picked an office color! Benjamin Moore Davenport Tan. Once again, the guys at the Cleveland Paint Co. were awesome and helpful. Thanks!