Took us about 4 hours and we were only sore for a week. #weekendgoals

Making a House a Home in Euclid, Ohio
Showing posts with label DIY. Show all posts
Showing posts with label DIY. Show all posts
Monday, May 20, 2019
Monday, October 29, 2018
Half Story Attic: In the Books, Finished
Well, is anything ever really finished in a house I'm living in?
No, the answer is no.
But this is darn close! It's lots of storage, a home theater, and a home office.

No, the answer is no.
But this is darn close! It's lots of storage, a home theater, and a home office.

Monday, March 12, 2018
3D Wallpaper in the master bedroom!
3D wallpaper. Sounds like something from the future circa 1962.
Our bedroom wall was boring. In the middle is a flat screen tv, soundbar, and fireplace. After we moved the large mirror to another wall, you could see a few obnoxious holes from screws and putting something else up there would make the wall look busy... but without the mirror, it looked blank. Unbalanced.
What to do?
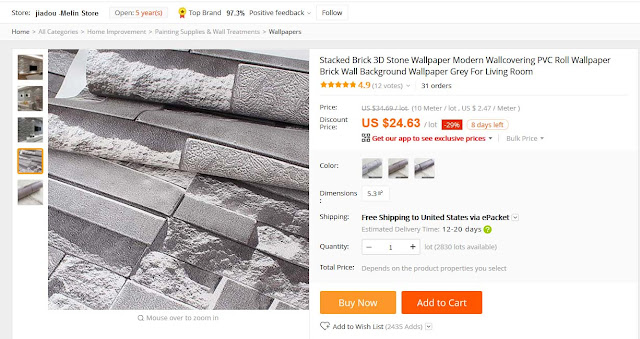
I've been trolling these neat stone and wood look wallpapers on Aliexpress for a while now, so guess what.
We bought a couple of rolls, some paste, and away we went.


I'm really impressed by how realistic this paper looks on the wall. This entire project cost about $50 including paste, new blades and a lovely smoothing squeegee.
We bought the lightest color they had, but they do sell darker shades as well!
Our bedroom wall was boring. In the middle is a flat screen tv, soundbar, and fireplace. After we moved the large mirror to another wall, you could see a few obnoxious holes from screws and putting something else up there would make the wall look busy... but without the mirror, it looked blank. Unbalanced.
 |
| The mirror got moved. Now it's ugly over here. |
What to do?
I've been trolling these neat stone and wood look wallpapers on Aliexpress for a while now, so guess what.
We bought a couple of rolls, some paste, and away we went.


I'm really impressed by how realistic this paper looks on the wall. This entire project cost about $50 including paste, new blades and a lovely smoothing squeegee.
We bought the lightest color they had, but they do sell darker shades as well!
Thursday, November 9, 2017
Dollar Tree Kitchen Cabinet Ribbon-Hung Christmas Bows!

These came together super fast! The bows were $1 each, and 9 feet of ribbon was $1. I had Velcro and Scotch tape lying around.

So bright and festive!


I purchased the large bows with the green and red stripes. They also had red velvet and red glitter in the large bows.
I snipped off 1 foot of ribbon (2.5 inch wired variety) per bow, attached it at the back with a square of Velcro, then Scotch taped the ribbon to the back of the cabinet doors.
Total cost per bow: $1.11!
Sunday, January 1, 2017
DIY Vinyl LP Record Album Floating Wall Shelves
Here's a simple and inexpensive shelving idea for displaying your LP 12" records! These come out and go in easily, and the shelf only needs to be cut down to the size you need. It's made out of vinyl so it is already white (or whichever color you choose) and will be super easy to keep clean.
Here's the finished product:

The two floating record shelves you see in this picture are approximately 88" long. The vinyl comes in 8' sections.
What you'll need for one 8' shelf:
Looking at the back of your U cap, stack 2 washers together and then add a brace, and screw all 3 into the cap with a #8 x 0.5 flat head screw, making sure the screw does not protrude into the U cap channel. Repeat this process at equal distances along the length of the U cap. This goes U cap - 2 washers - flat head screw.
Grab a level and mount your shelves on the wall. Use the top hole on the brace and attach to the wall using drywall screws (or whatever you have). It's best to begin in the center of your shelf and work your way towards the ends, maintaining level as you go.
Records will slide in from either side (again, make sure none of those little flat head screws poked through) or you can place them into the groove.
Total cost for two 8' vinyl "vinyl" shelves was only $22!
Here's the finished product:

The two floating record shelves you see in this picture are approximately 88" long. The vinyl comes in 8' sections.
What you'll need for one 8' shelf:
- 1 White Vinyl Lattice U Cap (Item #94468 at Lowe's)
- 4 #8 x 0.5-in Flat-Head Zinc-Plated Screws (100/pack) (Item #57224 at Lowe's)
- 8 #8 x 7/16-in Zinc-Plated Standard Flat Washers (36/pack) (Item #58122 at Lowe's)
- 4 0.5-in x 2-in Zinc-Plated Flat Braces (4/pack) (Item #315712 at Lowe's)
- Screws for mounting to the wall (we used drywall screws we had already)
 |
| U cap lattice moulding. |
 |
| This groove accommodates records perfectly. |
Looking at the back of your U cap, stack 2 washers together and then add a brace, and screw all 3 into the cap with a #8 x 0.5 flat head screw, making sure the screw does not protrude into the U cap channel. Repeat this process at equal distances along the length of the U cap. This goes U cap - 2 washers - flat head screw.
 |
| Hardware. |
 |
| Back of the U cap shelf, 2 washers, 1 brace, 1 screw. |
Grab a level and mount your shelves on the wall. Use the top hole on the brace and attach to the wall using drywall screws (or whatever you have). It's best to begin in the center of your shelf and work your way towards the ends, maintaining level as you go.
Records will slide in from either side (again, make sure none of those little flat head screws poked through) or you can place them into the groove.
Total cost for two 8' vinyl "vinyl" shelves was only $22!
Thursday, November 17, 2016
Lazy Days: A New Half-Story Ceiling

The paneling walls don't bother me too much, but there was an awful acoustic ceiling and one (1!!) light upstairs.
Guy and I decided to rip down the acoustic tile, and add a cubby (see the wall on the right? There's nothing back there but paneled-over empty space, so we cut in a door, and we can squeeze about 6 large totes in there.) Also we added dimmable LED recessed light, which I love.
We started this at the beginning of February, and since it's hot in the summer, we went to Cedar Point instead.
We are back at it and we have 100% of the drywall hung (never again), and we are in between finishing mudding and starting sanding.
Then it's paint, trim, and rip up the carpet.
In the meantime, here are some photos of our progress.
Saturday, January 9, 2016
LED Color-Changing Under Cabinet Lighting for $35!!
This is such a cool project. We ended up putting a new outlet in the back of one of the cabinets to hide wires, but on the other bank of cabinets, we plugged the LED's in behind the fridge.
There isn't much technical explaining here, and as we seem to run new Romex for every project we get into, so I guarantee that's covered elsewhere in this blog. For this one, just enjoy the photos and a video, too.

There isn't much technical explaining here, and as we seem to run new Romex for every project we get into, so I guarantee that's covered elsewhere in this blog. For this one, just enjoy the photos and a video, too.

Sunday, February 22, 2015

Sunday, February 15, 2015
Sunday Vaseline
We're taking the kitchen remodel slowly.
Guy and I spent the past hour trying to run Romex for a new outlet to go behind the refrigerator. Finally we accomplished this with a fish tape, pliers, electrical tape, and gobs of Vaseline.
Here's some photos of the progress and a bonus... the little trinkets we found while ripping the vent soffit down!
 |
| Hole cleaned up |
Friday, February 6, 2015
Ugh I'm Not a Multi-Tasker!
I have been neglecting everything lately. This blog, Euclid Ev... Everything!
As you know, our last major project was the bathroom. We have finally started in the kitchen. We purchased a sink seriously, almost 3 years ago. We pulled the trigger on a Maytag 24" Jetclean® Plus Dishwasher with Fully Integrated Controls in Black.

This is going to be amazing because we haven't ever had a dishwasher here... and I really, really hate that.
We also (well, Guy, really) got up and hacked out that awful ceiling thing that is supposed to be a vent but has TWO 90 degree bends, and isn't powered at all!
That's where we left it the other night. We have a bit more wood to remove.
We were thinking of exposing what we thought would be red brick (to the right in the last picture). It's red brick in the basement, but ugly gray blech in the kitchen, so it's staying covered. A little disappointing, but you know.
Also, we found some treasure when we cut open the ceiling! Don't worry, it has a market value of $0... but it's really the first time I've found little items from the past in my ceiling and I love it!
As you know, our last major project was the bathroom. We have finally started in the kitchen. We purchased a sink seriously, almost 3 years ago. We pulled the trigger on a Maytag 24" Jetclean® Plus Dishwasher with Fully Integrated Controls in Black.
This is going to be amazing because we haven't ever had a dishwasher here... and I really, really hate that.
We also (well, Guy, really) got up and hacked out that awful ceiling thing that is supposed to be a vent but has TWO 90 degree bends, and isn't powered at all!
 |
| Here it is... pointless. |
 |
| Simply a grill covering a hole. |
 |
| It takes up a ton of space. |
 |
| Get it Guy!! |
 |
| Yeah power tools!! |
 |
| Gah wood and metal. |
 |
| Going... |
 |
| Going.....! |
We were thinking of exposing what we thought would be red brick (to the right in the last picture). It's red brick in the basement, but ugly gray blech in the kitchen, so it's staying covered. A little disappointing, but you know.
Also, we found some treasure when we cut open the ceiling! Don't worry, it has a market value of $0... but it's really the first time I've found little items from the past in my ceiling and I love it!
Tuesday, January 6, 2015
Before & After: Master Bathroom
Trying to show off the house via my blog to extended family over the holidays was kind of a pita because of how spastically I blog, and how randomized my picture placement is, so I'll be doing a before and after for each room we've tackled.
Click for our master bathroom redo!
Click for our master bathroom redo!
 |
| From the realty listing |
Tuesday, August 5, 2014
Ze Bathroom.... She es fee-neshed!
I know, can you believe it? LeBron came back to Cleveland AND we finished the bathroom. Witness!
In all, we ripped up the tile floor and concrete board underlayment, then ripped up 2 layers of old linoleum under that. Took out and replaced the pedestal sink. Removed old shower tile, ripped out green board walls. cut out rotten/damaged studs. Removed old, LOUD, poorly performing exhaust fan. Removed cheap light fixture. Took down toilet paper holder and round towel rack.
Laid down 1/4" concrete board on the floor and 1/2" on the walls. Repaired studs. Tiled floor and walls. Installed floating vanity and sink with LED faucet. Built in two cubbies in the shower. Added pretty light above the mirror. Installed 2 recessed shower lights fresh. Installed built-in toilet paper holder and square hand towel rack. Installed Kohler frameless shower doors with clear glass. Installed QUIET, high performance exhaust fan.
We also swapped out a flat mirror with a GUNNERN mirror cabinet from Ikea.

Typing it out, it does not seem like much, but it was WORK! I won't go into too many deets, I am just glad it is finished, because it looks fantastic! It's clean, modern and we actually increased our space with the cubbies, the medicine cabinet, and the room under the sink.
I just today put the last coats of paint on the shelves that go in the skinny cabinet.
What I learned (aka, what I would do differently):
Score around your tile/area you are going to sledgehammer out, or better yet, saw it out... you'll thank me when you have beautiful, clean edges.
CHECK YOUR PRODUCTS. The shower doors were the second thing we purchased... and they sat for a month, unopened. We went to install and the hardware skin was missing completely! Fast forward a week, the skin shows up in the mail, we're halfway through with the install and Kohler sent us the wrong brackets! This really extended the entire project... so again, check your products!
Oh and of course, here's some photos. I have to hunt my 18-55 lens down, so I can get some nice shots of the entire bathroom.


In all, we ripped up the tile floor and concrete board underlayment, then ripped up 2 layers of old linoleum under that. Took out and replaced the pedestal sink. Removed old shower tile, ripped out green board walls. cut out rotten/damaged studs. Removed old, LOUD, poorly performing exhaust fan. Removed cheap light fixture. Took down toilet paper holder and round towel rack.
Laid down 1/4" concrete board on the floor and 1/2" on the walls. Repaired studs. Tiled floor and walls. Installed floating vanity and sink with LED faucet. Built in two cubbies in the shower. Added pretty light above the mirror. Installed 2 recessed shower lights fresh. Installed built-in toilet paper holder and square hand towel rack. Installed Kohler frameless shower doors with clear glass. Installed QUIET, high performance exhaust fan.
We also swapped out a flat mirror with a GUNNERN mirror cabinet from Ikea.
Typing it out, it does not seem like much, but it was WORK! I won't go into too many deets, I am just glad it is finished, because it looks fantastic! It's clean, modern and we actually increased our space with the cubbies, the medicine cabinet, and the room under the sink.
I just today put the last coats of paint on the shelves that go in the skinny cabinet.
What I learned (aka, what I would do differently):
Score around your tile/area you are going to sledgehammer out, or better yet, saw it out... you'll thank me when you have beautiful, clean edges.
CHECK YOUR PRODUCTS. The shower doors were the second thing we purchased... and they sat for a month, unopened. We went to install and the hardware skin was missing completely! Fast forward a week, the skin shows up in the mail, we're halfway through with the install and Kohler sent us the wrong brackets! This really extended the entire project... so again, check your products!
Oh and of course, here's some photos. I have to hunt my 18-55 lens down, so I can get some nice shots of the entire bathroom.
 |
| Gunnern Mirror |
 |
| Grout is 185 New Taupe |
Monday, July 14, 2014
Bathroom Jen: Older, Wiser...
There have been many epic battles that mere mortals have courageously faced head on. The Battle of Hastings, the Siege of Orleans. Neither lost to the endless span or clutter of history, will forever be to my recollection, allegedly, among the ranks of this bathroom remodel.
It is now July 14th and we began this journey on June 16th. I miss my real bathroom.
Just yesterday Guy finished the tile. Today it's my job to give the room a good clean up so we may grout in the next two days. I cannot tell you how refreshing it feels to be doing something other than installing tile! One more trip to the tile aisle at the Euclid Home Depot and they are going to crown me Grand Marshal of mortar.
Oh, but the recessed lighting is in place, and it looks even more stellar than I could have hoped! This update is more of an excuse for a photo dump, so without further teasing...
We chose our grout color, too. I think it'll go very nicely with the tile:

So what's that leave?
 |
| She is woman, hear her grout. |
It is now July 14th and we began this journey on June 16th. I miss my real bathroom.
Just yesterday Guy finished the tile. Today it's my job to give the room a good clean up so we may grout in the next two days. I cannot tell you how refreshing it feels to be doing something other than installing tile! One more trip to the tile aisle at the Euclid Home Depot and they are going to crown me Grand Marshal of mortar.
Oh, but the recessed lighting is in place, and it looks even more stellar than I could have hoped! This update is more of an excuse for a photo dump, so without further teasing...
 |
| 2 layers of linoleum under the old cement board |
 |
| Shelves! |
 |
| Tiled! We had the shorten the shelf at left |
 |
| I TOLD you these looked outstanding! |
 |
| Mosaic over the plumbing line |
So what's that leave?
- Grout walls and floor
- Install vanity and sink
- Install glass shelves
- Install new exhaust fan
Subscribe to:
Posts (Atom)