Showing posts with label Lighting. Show all posts

Sunday, July 30, 2017

Replace Energy Sucking Landscape Floodlights with LED for $1


Have low-voltage flood lights around your house? I do... 13 of them.

At 20 watts a bulb, that's a lot of energy consumption for all intents and purposes, decorative lighting.

You can easily retrofit these kits and fixtures with LED light bulbs from big box stores, but you will be paying for them, to the tune of about $7 per bulb.

Standard, incandescent 20 watt bulb vs energy efficient LED
I'm happy to share that I've found an alternative to the expensive bulbs from Home Depot and Lowe's! These cost from 90 cents to about a dollar a piece. That's a savings of hard, cold cash and a whopping 17 WATTS per light!

G4 LED COB 3W warm or cool white bulb.

Did I mention they are available in cool or warm white? Here's pictures after installation:

Back garage line, 3 lights

Side of house, 3 lights

Buy them here: G4 LED COB 3W warm or cool white bulb.

The planet, and your wallet, will thank you.

Wednesday, April 26, 2017

Vintage Edison Hanging Bedroom Lights

When we upgraded to a king sized-bed, we had to give up our existing nightstands. This was fine as they tend to fill up with junk anyway, but it did present a problem for bedside lighting.

Out of necessity, we bought some parts from Ikea and the Home Depot, and we made these lovely wall mounted lights with vintage filament bulbs.


EKBY VALTER Bracket, black, 11" $5.00
SEKOND Cord set with LED bulb, black, white textile $13.00
Feed-through cord switch (available anywhere) $3.99
Adamax Metal Lamp Guard $4.97
Feit 60-Watt Vintage Style Incandescent Light Bulb $4.94


Total for one lamp: $31.90


I'll show off the shelving soon.

Thursday, November 17, 2016

Lazy Days: A New Half-Story Ceiling

We have a half story upstairs. We are fortunate because someone already made 2 spacious closets up there, there's electrical run, HVAC is there, and there are walls and a ceiling.

The paneling walls don't bother me too much, but there was an awful acoustic ceiling and one (1!!) light upstairs.

Guy and I decided to rip down the acoustic tile, and add a cubby (see the wall on the right? There's nothing back there but paneled-over empty space, so we cut in a door, and we can squeeze about 6 large totes in there.) Also we added dimmable LED recessed light, which I love.

We started this at the beginning of February, and since it's hot in the summer, we went to Cedar Point instead.

We are back at it and we have 100% of the drywall hung (never again), and we are in between finishing mudding and starting sanding.

Then it's paint, trim, and rip up the carpet.

In the meantime, here are some photos of our progress.

Tuesday, January 19, 2016

LED Bathroom Waterfall Faucet UPDATE

So it's been about 36 months that we have been using the waterfall LED light up glass and chrome faucet bought from ebay. It's held up well enough to this point, but about a month or two back, the LED's suddenly began remaining on at all times. We thought swapping out the batteries would help, but it doesn't.


As a faucet, it still works fine. I plan to take it apart and see if it's a fixable issue. It was neat enough, but I can't say I'm crazy about the waterfall aspect of it. For $48 though, I'm still not complaining.

Saturday, January 9, 2016

LED Color-Changing Under Cabinet Lighting for $35!!

This is such a cool project. We ended up putting a new outlet in the back of one of the cabinets to hide wires, but on the other bank of cabinets, we plugged the LED's in behind the fridge.

There isn't much technical explaining here, and as we seem to run new Romex for every project we get into, so I guarantee that's covered elsewhere in this blog. For this one, just enjoy the photos and a video, too.

Tuesday, January 6, 2015

Before & After: Master Bathroom

Trying to show off the house via my blog to extended family over the holidays was kind of a pita because of how spastically I blog, and how randomized my picture placement is, so I'll be doing a before and after for each room we've tackled.

Click for our master bathroom redo!

From the realty listing

Tuesday, August 5, 2014

Ze Bathroom.... She es fee-neshed!

I know, can you believe it? LeBron came back to Cleveland AND we finished the bathroom. Witness!

In all, we ripped up the tile floor and concrete board underlayment, then ripped up 2 layers of old linoleum under that. Took out and replaced the pedestal sink. Removed old shower tile, ripped out green board walls. cut out rotten/damaged studs. Removed old, LOUD, poorly performing exhaust fan. Removed cheap light fixture. Took down toilet paper holder and round towel rack.

Laid down 1/4" concrete board on the floor and 1/2" on the walls. Repaired studs. Tiled floor and walls. Installed floating vanity and sink with LED faucet. Built in two cubbies in the shower. Added pretty light above the mirror. Installed 2 recessed shower lights fresh. Installed built-in toilet paper holder and square hand towel rack. Installed Kohler frameless shower doors with clear glass. Installed QUIET, high performance exhaust fan.

We also swapped out a flat mirror with a GUNNERN mirror cabinet from Ikea.


Typing it out, it does not seem like much, but it was WORK! I won't go into too many deets, I am just glad it is finished, because it looks fantastic! It's clean, modern and we actually increased our space with the cubbies, the medicine cabinet, and the room under the sink.

I just today put the last coats of paint on the shelves that go in the skinny cabinet.

What I learned (aka, what I would do differently):

Score around your tile/area you are going to sledgehammer out, or better yet, saw it out... you'll thank me when you have beautiful, clean edges.

CHECK YOUR PRODUCTS. The shower doors were the second thing we purchased... and they sat for a month, unopened. We went to install and the hardware skin was missing completely! Fast forward a week, the skin shows up in the mail, we're halfway through with the install and Kohler sent us the wrong brackets! This really extended the entire project... so again, check your products!

Oh and of course, here's some photos. I have to hunt my 18-55 lens down, so I can get some nice shots of the entire bathroom.

Gunnern Mirror
Gunnern Mirror


Grout is 185 New Taupe


Friday, June 7, 2013

Mid Century Chrome Chandelier

Take two photoshoot! I'm doing some digging around, I'd like to uncover who the manufacturer of this chandelier was and when it's from. I've found a few sales listings for similar hanging lights, but they don't have much information, either. I've found fixtures that have four, five and even eight lights. I'm guesing the mid to late 1960's on this. Did it have different manufacturers? Which style of globes did it come with?
Mid Century Chrome Chandelier
Source

Source
Mid Century Modern Chrome Chandelier
Source
Mid Century Chrome 8 Globe Chandelier
Source

A little Mid-Century Chrome for our Kitchen

I have no problem admitting that, once in a BLUE moon, I overlook an object that is in fact a diamond in the rough. I'm thankful that my husband and my brother could see, in my moment of blindness, a treasure.

I had intended from the beginning to paint and hang a chandelier like this as the second light in my eat-in kitchen:
Little Cape Cod: teal and yellow painted chandeliers
Pinterest is taking over my life
And I was loving the idea, but until I could devise a kitchen color scheme, it sat down in the basement, with its shiny brass finish, while this travesty hung in the kitchen.

Little Cape Cod: ugly flush mount light in white and gold
It came from the 90's

A while ago my brother gave me a silver fixture/chandelier. It was in need of a cleanup (it looked super rusty) and it was missing all four globes. I really didn't think it would, well... I couldn't visualize it finished, hanging, shiny.

So today we're at the Home Depot and we grabbed 4 super cheap glass globes. Now I'm feeling a little more stoked about this, because I was happy that the globes were standard and easily replaced.

I got to cleaning up the fixture and surprisingly, it wasn't much rust at all, mostly dirt. Yeah!

Dry it, stick the matching medallion on the ceiling and install*.

So here it is: I missed the boat on this one. It's clean and showy and looks perfect in the kitchen, where eventually, seating will be.

Also, I cannot take a picture that does this chandelier justice. I'll have to try again when the sun is up.


It has a total of five lights: Four that sit horizontally and one that points straight down. You can have on none, either, or all.

*Guy does all the electric wiring and mounting, while I sit in the next room and reassure the dog that nothing is wrong.

Sunday, June 2, 2013

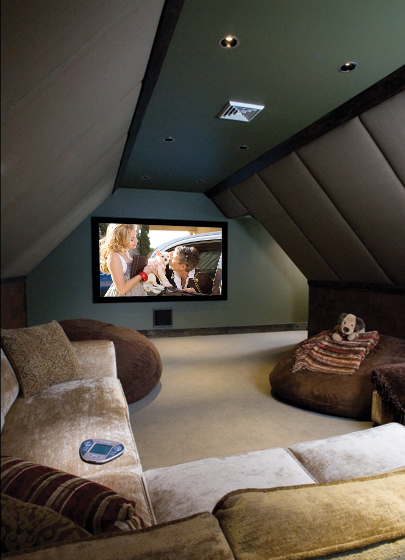
Second Story Inspiration

Dresser is about halfway finished. Gel stain is STICKY and mineral spirits are wonderful.

Meh.

Anyway, our Cape Cod's layout is fairly typical, especially on the second floor. It's a half story with 2 small dormers.

The bit of white on the left is the bathroom that we're finishing up now. There's a a good amount of  storage. It's decently sized and currently holds nothing.

Obviously the paneling is ugly. There's some staining on the acoustic ceiling tile, but it could be painted. The carpeting is still there, aside from a couple big stains, it is in very good condition. I'd like to turn this into living space that we actually would go up and spend time in, if that makes sense. A sofa is a definite, but I'd love to get creative with it, too.

So, paint the paneling? There's ONE light... our neighbor gave us 2 big fixtures that match and are brand new, so they are going up (unless I can con hubs into recessed lighting), and I'd like to make that one light into two, one on each side. 

Until that day arrives, help yourself to some attic eye candy:
Dream Cape Cod Attic
Nautical and cozy! Source
Dream Cape Cod Attic
Love the color, lights, built-in.

Dream Cape Cod Attic
Built in seating/shelving. I like the way it curves with the ceiling.
Dream Cape Cod Attic
I wish. Source

Friday, April 12, 2013

Paint and Patchwork

Patch, patch, patch. That's what our back entrance really needed.

It was pretty beat up and neglected, not to mention filthy.

It's been done for about a week now (done-ish) and looks a LOT better.

Before: Was a dirty brown, the walls, ceiling and baseboards were all painted the same color. There were holes galore. The light was an old acorn style.

Someone fucking hated this wall.

After: Ceiling white, oops paint, drywall mud save the day and a snazzy new flush-mount ceiling light. I LOVE the light fixture, and it actually gives off more like than the acorn fixture.

Our $8 "oops" paint from Walmart

Hampton Bay Flaxmere Round purchased on eBay for $22!
I have some nickel coat hooks I'm going to install, probably, near the switches. I'm still devising the prettiest way to do it, of course.